| Português do Brasil | |
| Deutsch | |
| English | |
| Español | |
| Français | |
| Italiano | |
| 日本語 | |
| 한국어 | |
| Nederlands | |
| Polski | |
| Русский | |
| Українська | |
| 中文 |
![]()
For situations where you need to increase or decrease precise values to a key or attribute.
|
Share it:
![]()
Nudge selected keys to the left or right.
Tip: if you go to an empty frame and Nudge Left Right, the next right key will snap to that frame.
Nudge commands move keys around. You can nudge selected keys or even all keys existent in the scene. |
Share it:
![]()
Offset the timing to the left or right without offsetting and messing your keys. It's the same command as the Time Offsetter Slider, but you can input the amount of frames you want to nudge/offset.
TIP: Try using Mirror All Keys + Time Offsetter in a walk cycle.
|
Share it:
![]()
Nudge all keys from selected objects to the left or right.
Nudge commands move keys around. You can nudge selected keys or even all keys existent in the scene. |
Share it:
![]()
Nudge all keys existent in your scene to the left or right.
Tip: if you want to perform other actions on all animation curves in your scene, you can use the Select All Anim Curves in the Scene command, found in the Extra Tools/Selection Tools.
Try for instance combining Insert Inbetween and Nudge All Keys if you want to nudge sections of the animation around.
|
Share it:
![]()
Set an even inbetween for all keys.
|
Share it:
![]()
Insert or remove empty frame(s) between keys.
Tip: Select a bunch of keys and it will add empty frame(s) between all of them.
Inbetween commands inserts or removes empty frames between keyframes. You can act on selected keys or even all keys existent in the scene. |
Share it:
![]()
Insert or remove empty frame(s) between all existent keys in your scene.
Tip: if you want to perform other actions on all animation curves in your scene, you can use the Select All Anim Curves in the Scene command, found in the Extra Tools/Selection Tools.
Inbetween commands inserts or removes empty frames between keyframes. You can act on selected keys or even all keys existent in the scene. |
Share it:
![]()
Resets your pose to it's defaults.
Anim by Alessandra Mota. TIP: Try using the Blend to Default Slider to gradually blend your pose to it's defaults.
Anim by Bruna Berford. |

Share it:
![]()
Resets only translation, rotation and scale channels to it's defaults. See how Reset Translation, Rotation, Scale works:
Anim by Alessandra Mota. |
Share it:
![]()
Stores your selected pose as the preferred default pose (also known as T-pose, neutral, zero or bind pose). By default, animBot reads the attribute default value (defined in rigging) as the default pose. Many times that is not the pose we expect. This will override those values to whatever you want to define as default.
Default poses work across rigs, as long as they have same convention control names. TIP: You can manage the poses you snapshot in the right-click menu.
Anim by Alessandra Mota. This will affect Reset Pose, Blend to Default and Scale from Default.
Anim by Alessandra Mota. Anim by Bruna Berford. |
Share it:
![]()
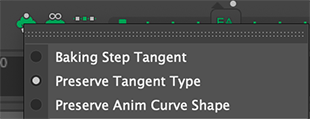
Bake channels resulting on a key at every frame.
Check the baking options in the right click menu.
|
Share it:
![]()
Bake channels resulting on a key at every other frame.
Check the baking options in the right click menu.
|
Share it:
![]()
Bake channels resulting on a key at every three frames.
Check the baking options in the right click menu.
|
Share it:
![]()
Bake channels resulting on a key at every four frames.
Check the baking options in the right click menu.
|
Share it:
![]()
Bake channels resulting on a key at a customizable interval.
Check the baking options in the right click menu.
|
Share it:
![]()
Bake channels resulting on same key times as the last selected object.
This is different from Share Key Times From Last Selected, because it will remove keys that doesn't match the last selected object key times. In addition to that, it will bake any connections such as constraints. Check the baking options in the right click menu.
|

Share it:
![]()
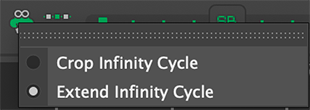
Bake anim curves pre and post infinity into editable keys. This is a convenient way to work with cycles and bake them for further editing.
Check the baking options in the right click menu.
|
Share it:
![]()
Add keys to all common times from your selection. It's useful when you grab a control that has no keys but you wish it had the same keys as another control. Before this command your would have to select both controls and hit 'next key - set key', 'next key - set key'... until you set all keys.
Anim by Alessandra Mota. By default it will apply to all keys. If you want a shorter range, you can highlight the timeline or select keys in the graph editor. |
Share it:
![]()
Add keys from last selected object key times, to all objects but the last selected object.
This is different from Bake From Last Selected, because it will not remove any keys and will not bake any connections such as constraints. |

Share it:
![]()
Store key times from selection, to be pasted later.
|
Share it:
![]()
Store key times from selection that matches current key color, to be pasted later.
|
Share it:
![]()
Set keys from previously stored key times, while keeping the selected object keys.
|

Share it:
![]()
Set keys from previously stored key times, at current frame.
|
Share it:
![]()
Set keys from previously stored key times, while cleaning mismatching keys from selected object.
|

Share it:
![]()
Tint keys from previously stored key times, without setting new keys.
|
Share it:
![]()
Connects a section of animation to a neighbor pose. Select a keyframe or go to the first or last frame of the section to connect and nudge the slider.
You can also select a specific range of keys.
TIP: If you use this very often in your workflow, consider setting a hotkey!
|

Share it:
![]()
Recalculate your keys in a perfect ease in or out.
Tip: This slider will ignore your current key values. Try the yellow slider Blend to Ease if you want to use your current poses and gradually blend to the perfect ease.
Remember: With animBot you can always target keys on the timeline and also filter the channels.
TIP: If you frequently notice rotation weirdness between two keys after using this tool, consider enabling Smart Euler Filter while working. You can also apply Smart Euler filter later on affected areas.
|


Share it:
![]()
Smooth a transition gap while maintaining the animation details.
Great for stitching two chunks of animation together without making the transition floaty.
|
Share it:
![]()
Create noise or wave out of your selected keys.
Tip: Try using Baking Keys on an animation curve to create some keys before applying Noise.
Tip: Try combining different sliders.
|
Share it:
![]()
Soften or intensify your pose. Some animators know this as 'amp/deamp' tool.
You can deamp a whole animation section.
Anim by Arturo Garcia. Tip: Move the slider knob all the way to the left and your keys will align in a perfect linear fashion.
|
Share it:
![]()
Simplify (remove keys) or bake (add keys) your animation curve. Simplify Keys uses a smart algorithm that will delete keys maintaining the animation curve's shape. Very powerful for cleaning mocap animation.
Tip: Try combining different sliders.
Tip: You can bake keys using either Simplify|Bake Keys Slider, Tint Key Green or Set Smart Key.
|
Share it:
![]()
Soften your animation curve or make it harsh. Smooth is really good for softening noise, like dirty mocap animation.
TIP: You can create moving holds out of dead keys by smoothing them a few times.
|
Share it:
![]()
Offset the timing without offsetting and messing your keys.
If you need more precision, use Nudge Time Offsetter.
Try Time Offsetter Stagger to make quick overlaps.
|

Share it:
![]()
Will spread the offset in order of selection. Great for making quick overlaps for FK chains or break tweening on several objects.
|
Share it:
![]()
Scale your keys up or down based on the average value of selected keys. Tip: Move the slide knob all the way to the left to relative invert your animation curve.
|
Share it:
![]()
Scale your keys up or down based on the rig default value. Tip: Move the slide knob all the way to the left to invert your animation curve.
Tip: Use it to intensify or release tension on your poses.
Anim by Bruna Berford. |
Share it:
![]()
Scale your keys up or down based on the desired frame value.
Tip: Try also Blend to Frame to gradually blend your current pose to the desired frame.
|
Share it:
![]()
Scale your keys up or down based on the neighbor left key value.
Good for intensifying anticipations or overshoots.
Tip: Try also Blend to Neighbors.
|
Share it:
![]()
Scale your keys up or down based on the neighbor right key value.
Good for intensifying anticipations or overshoots.
Tip: Try also Blend to Neighbors.
|
Share it:
![]()
That's the classic Tween Machine taken to a whole new level.
Based on traditional animation techniques, with this one you can create precise inbetween keys, first pass breakdowns and save hours of work by basically not dealing with animation curve tangents.
Clicking (not dragging) is equivalent to:
TIP: Try Tweener overshoot.
TIP: If you frequently notice rotation weirdness between two keys after using this tool, consider enabling Smart Euler Filter while working. You can also apply Smart Euler filter later on affected areas.
|
Share it:
![]()
World Space Mode will ignore the hierarchy and calculate the pose globally. Good to stick controls to world space.
Also helpful to counter animate FK chains.
Sliders with World Space ability: Tweener, Blend to Frame, Blend to Neighbors and Blend to Infinity. You can use it to fix/bake gimbal locks.
TIP: You can solve most gimbal locks with one of these 3 solutions:
TIP: Use World Space sliders if you want them to consider the global transform by combining animation curves in Animation Layers.
|

Share it:
![]()
Blend your current keys to your buffer curves.
|
Share it:
![]()
Blend your pose to the rig default pose.
|
Share it:
![]()
Tight up spacing by forcing the easing.
Tip: Try combining different sliders.
Remember: With animBot you can always target keys on the timeline and also filter the channels.
|
Share it:
![]()
Blend your current pose to another pose at desired frame.
Tip: This is extremely helpful when you need to grab poses from other frames, like when lip synching, with the advantage of gradually blending.
Anim by Alessandra Mota. It's also useful when creating A/B poses with intensity variations, such as a first lip sync pass.
|
Share it:
![]()
World Space Mode will ignore the hierarchy and calculate the pose globally. Good to stick controls to world space.
Also helpful to counter animate FK chains.
Sliders with World Space ability: Tweener, Blend to Frame, Blend to Neighbors and Blend to Infinity. You can use it to fix/bake gimbal locks.
TIP: You can solve most gimbal locks with one of these 3 solutions:
TIP: Use World Space sliders if you want them to consider the global transform by combining animation curves in Animation Layers.
|
Share it:
![]()
That's probably the old aTools signature. Blend your current pose to the neighbor poses.
Tip: You can start off a breakdown with Tweener, then fine tune it with Blend to Neighbors.
|
Share it:
![]()
World Space Mode will ignore the hierarchy and calculate the pose globally. Good to stick controls to world space.
Also helpful to counter animate FK chains.
Sliders with World Space ability: Tweener, Blend to Frame, Blend to Neighbors and Blend to Infinity. You can use it to fix/bake gimbal locks.
TIP: You can solve most gimbal locks with one of these 3 solutions:
TIP: Use World Space sliders if you want them to consider the global transform by combining animation curves in Animation Layers.
|
Share it:
![]()
Blend or create infinity poses.
Tip: Great to create handles.
|
Share it:
![]()
World Space Mode will ignore the hierarchy and calculate the pose globally. Good to stick controls to world space.
Also helpful to counter animate FK chains.
Sliders with World Space ability: Tweener, Blend to Frame, Blend to Neighbors and Blend to Infinity. You can use it to fix/bake gimbal locks.
TIP: You can solve most gimbal locks with one of these 3 solutions:
TIP: Use World Space sliders if you want them to consider the global transform by combining animation curves in Animation Layers.
|
Share it:
![]()
Blend your pose to the last undo action.
In other words, you can gradually undo your last change. Went too far? Undo just a little.
|
Share it:
![]()
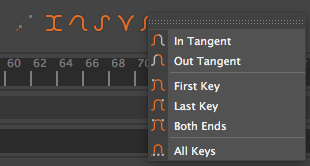
Match the tangent on a cycle.
It will favor targeting the last key, unless you select the last key or use the commands on the right click menu.
TIP: Try using Polished Tangent for a smooth cycle connection.
|
Share it:
![]()
Based on the relationship of your keys, it will guess what is the best Maya native tangent to apply. It’s usually a better first pass than just applying Auto tangent to everything.
TIP: Try using Polished Tangent for the first spline pass.
|
Share it:
![]()
Based on the relationship of your keys, it will calculate the best smooth tangent transitions between keys.
This is good to keep the movement controlled by the keys, it will keep overshoots to a minimum. Connect cycles smoothly.
Tip: Try designing your spacing with Tweener instead of tangent handles.
|

Share it:
![]()
Based on the relationship of your keys, it will calculate the best flowing transitions between keys. This is good to inherit momentum from neighbor poses to keep the movement flowing, even if that costs a few overshoots.
Good when flow is more important than pose control, like on a tail wagging.
|
Share it:
![]()
Nice sharp tangents, good for 'hitting a wall', when you don’t want any easing in and/or out.
TIP: Make shark fin tangents by applying to In Tangents.
|
Share it:
![]()
Nothing new here, just a shortcut for the native Maya tangents. With the advantage of applying directly to the timeline.
Tip: There is some extra things you can do on the right click menu.
|
Share it:
![]()
Gradually blend to Best Guess tangents.
Based on the relationship of your keys, it will guess what is the best Maya native tangent to apply. It’s usually a better first pass than just applying Auto tangent to everything.
|
Share it:
![]()
Gradually blend to Polished tangents.
Based on the relationship of your keys, it will calculate the best smooth tangent transitions between keys. This is good to keep the movement controlled by the keys, it will keep overshoots to a minimum.
TIP: You may get quick final results by mixing Auto, Polished and Flow tangents.
|
Share it:
![]()
Gradually blend to Flow tangents.
Based on the relationship of your keys, it will calculate the best flowing transitions between keys. This is good to inherit momentum from neighbor poses to keep the movement flowing, even if that costs a few overshoots.
TIP: You may get quick final results by mixing Auto, Polished and Flow tangents.
|
Share it:
![]()
Gradually blend to Bounce tangents.
Nice sharp tangents, good for 'hitting a wall', when you don’t want any easing in and/or out.
|
Share it:
![]()
Gradually blend to Auto tangents.
TIP: You may get quick final results by mixing Auto, Polished and Flow tangents.
|
Share it:
![]()
Gradually blend to Spline tangents.
|

Share it:
![]()
Gradually blend to Clamped tangents.
|
Share it:
![]()
Gradually blend to Linear tangents.
|
Share it:
![]()
Gradually blend to Flat tangents.
TIP: Negative values will force tangents easing.
|
Share it:
![]()
Gradually blend to Plateau tangents.
|
Share it:
![]()
Tint the keys RED on your timeline. That’s a way to visually organize your keys. Red keys are default keys that can be used for instance to identify your golden poses and extremes.
You can delete only red keys or tint all keys RED in the scene to restore the default.
If you want to save some UI screen space, let just one Tint Key button on the toolbar and use shortcuts to access all commands.
Limitations: The animBot Color Keys is an attempt to robustly and cleanly tag colors to keys using native Maya resources, without using any extra supporting curves, extra nodes or metadata that would mess with your scene. Although I’d love to have available as many colors as the Select Set does, Maya natively is limited to 3 colors only. In addition to that, green keys are the Maya native 'breakdown keys', which has a behaviour of constraining its time to neighbor keys (if you nudge neighbor keys, it will automatically nudge itself), hence its recommended its use only for baked keys (frame-by-frame). |

Share it:
![]()
Tint the keys YELLOW on your timeline. That’s a way to visually organize your keys. Yellow keys are special tick keys that can be used for instance to identify your breakdowns, double extremes and inbetween keys.
You can delete only yellow keys.
If you want to save some UI screen space, let just one Tint Key button on the toolbar and use shortcuts to access all commands.
Limitations: The animBot Color Keys is an attempt to robustly and cleanly tag colors to keys using native Maya resources, without using any extra supporting curves, extra nodes or metadata that would mess with your scene. Although I’d love to have available as many colors as the Select Set does, Maya natively is limited to 3 colors only. In addition to that, green keys are the Maya native 'breakdown keys', which has a behaviour of constraining its time to neighbor keys (if you nudge neighbor keys, it will automatically nudge itself), hence its recommended its use only for baked keys (frame-by-frame). |
Share it:
![]()
Tint the keys GREEN on your timeline. WARNING!!! This will turn your key into a Maya native 'breakdown key' and will change it's behaviour, please read second page of this tooltip for more information. That’s a way to visually organize your keys. Green keys are good for identifying baked keys (frame-by-frame).
You can delete only green keys.
Tip: You can bake keys using either Simplify|Bake Keys Slider, Tint Key Green or Set Smart Key.
If you want to save some UI screen space, let just one Tint Key button on the toolbar and use shortcuts to access all commands.
Limitations: The animBot Color Keys is an attempt to robustly and cleanly tag colors to keys using native Maya resources, without using any extra supporting curves, extra nodes or metadata that would mess with your scene. Although I’d love to have available as many colors as the Select Set does, Maya natively is limited to 3 colors only. In addition to that, green keys are the Maya native 'breakdown keys', which has a behaviour of constraining its time to neighbor keys (if you nudge neighbor keys, it will automatically nudge itself), hence its recommended its use only for baked keys (frame-by-frame). |
Share it:
![]()
Automatically tint your keys when using animBot commands. Sliders inbetween keys will be tinted yellow, Baked keys will be tinted green, Set Smart Key will check neighbor keys and tint accordingly.
Tip: You can bake keys using either Simplify|Bake Keys Slider, Tint Key Green or Set Smart Key. It's useful to tint baked keys as you can easily clear that later.
|
Share it:
![]()
Display the selected objects and filter selection.
Anim by Alessandra Mota. |
Share it:
![]()
Selection buttons to help selecting chunk of rig controls. It's meant to be a quick and simple way to organize and select stuff in your scene and despite of not being a picker substitute, if you don't have one it will do a pretty decent job.
Anim by Alessandra Mota. TIP: Try using Select Sets to isolate stuff in your scene instead of the native Maya layers!
Anim by Bruna Berford. It's simple and easy to manage the buttons.
If you want to transfer your select sets from one scene to another, you can do so by right clicking the Select Sets button.
|
Share it:
![]()
Select opposite rig controls.
Tip: Using Select Opposite tools with Mirror tools can be very effective.
|
Share it:
![]()
Builds an opposite controls table by analyzing your rig. In case your rig has left, right or center controls that are not named in a logical convention, you can use this command to tell animBot which one is which.
animBot will check if there is a correspondent opposite control based on its world position. Knowing the opposite pair of controls plays an essential role in mirroring poses |
Share it:
![]()
Copy (store) the animation of selected objects. You can then paste the animation in the same or another Maya session, to the same objects, other objects, other channels and even to another namespace/character. Transfer animation to a fresh new scene:
Anim by Jorge Vigara. Copy one or more anim curves to other channels:
Stitch chunks of animation together:
Copy animation from one character to another:
Anim by Alessandra Mota. Anim by Bruna Berford. Anim by Jorge Vigara. |

Share it:
![]()
Insert the chunk of animation you copied at the current frame. It stitches chunks of animation together in a non-destructible way, it will do all necessary jobs to preserve previous and future animation.
Anim by Alessandra Mota. Anim by Bruna Berford. TIP: If you frequently notice rotation weirdness between two keys after using this tool, consider enabling Smart Euler Filter while working. You can also apply Smart Euler filter later on affected areas.
|
Share it:
![]()
Completely replace the current animation with the one you copied. Animation layers will also be replaced (constraints will be supported eventually).
TIP: If you suspect your rig got broken, you can use this command to transfer the animation to a fresh new rig. Anim by Jorge Vigara. |
Share it:
![]()
Copy (store) the pose of selected objects. You can then paste the pose in the same or another Maya session, to the same objects, other objects and even to another namespace/character.
The difference of using Copy Pose instead of Copy Animation is that the pose will come in baked, clean of keys, animation layers, tangents or constraints. Anim by Jorge Vigara. |
Share it:
![]()
Paste the pose you copied.
TIP: If you have objects selected when pasting, animBot will prefer pasting only to those objects.
Anim by Jorge Vigara. TIP: If you frequently notice rotation weirdness between two keys after using this tool, consider enabling Smart Euler Filter while working. You can also apply Smart Euler filter later on affected areas.
|
Share it:
![]()
Mirror a pose to the opposite rig controls.
Tip: You can apply to multiple keys.
Turn on Auto Mirror to edit a pose in a symmetry fashion.
Tip: Try using Blend to Mirror Slider, it will gradually mirror a current pose.
Anim by Bruna Berford. Tip: Using Select Opposite tools with Mirror tools can be very effective.
TIP: If you frequently notice rotation weirdness between two keys after using this tool, consider enabling Smart Euler Filter while working. You can also apply Smart Euler filter later on affected areas.
|


Share it:
![]()
Mirror a pose exclusively to the right side rig controls.
|
Share it:
![]()
Mirror a pose exclusively to the left side rig controls.
|
Share it:
![]()
Mirror the entire animation.
Anim by Daniel Cabral. TIP: If you frequently notice rotation weirdness between two keys after using this tool, consider enabling Smart Euler Filter while working. You can also apply Smart Euler filter later on affected areas.
|
Share it:
![]()
Builds a mirror table by analyzing a rig.
This command is only useful when applying a mirror doesn't get to the results you expect, as animBot will run this automatically when needed. As automation has many variables involved, issues building a mirror table on the fly can happen, so by running this command with the rig in the default (T-Pose) it will make sure to build it correctly. You only need to run this once per character. Tips for troubleshooting if mirroring is not working: 1) First and foremost, if you haven't run Bundle Snapshot, please do so. That command will scan a rig and animBot will learn how to mirror a rig properly for most cases.
2) For channels that are not mirroring correctly you can use Fix Mirror Setting command (found in Mirror Snapshot right click menu)
3) Does a control have the opposite named correctly? You can test which control is the opposite using the Select Opposite tool, if it doesn't find one, it won't mirror properly. If Bundle Snapshot didn't fix that, you can use Fix Opposite Controls. 4) Lastly, you can edit the mirror table file, located in your user/maya/scripts/animBot_data/mirror_settings_snapshot.anb Case that will never work: Inversion is done on a per-channel basis, so if a rig demands that translateX must invert translateY to the opposite control, it won't work. |
Share it:
![]()
Snap-Align all selected objects to the last selected object.
Tip: It gets very powerful when applying to multiple keys.
Anim by Carolina Delgado. TIP: If you frequently notice rotation weirdness between two keys after using this tool, consider enabling Smart Euler Filter while working. You can also apply Smart Euler filter later on affected areas.
|
Share it:
![]()
Snap-Align all selected objects to the last selected object for all keys in the timeline.
Anim by Carolina Delgado. TIP: If you frequently notice rotation weirdness between two keys after using this tool, consider enabling Smart Euler Filter while working. You can also apply Smart Euler filter later on affected areas.
|
Share it:
![]()
Utility to help animating without the hassle of dealing with Maya constraints when holding/releasing objects.
Unlike conventional constraints, it doesn't create any node or connection in your scene, everything happens on the fly, so objects orientation and future poses are kept intact. The basic use is very simple, you copy the relationship of selected objects and paste it somewhere.
TIP: You can paste to the same objects at another frame, other objects or even to another Maya. |


Share it:
![]()
Paste the children-parent xform relationship to selected objects.
The last selected object will be the parent and won't be affected. TIP: You can copy the xform relationship and paste to different objects.
TIP: You can paste to a bunch of keyframes at once by highlighting a range in the timeline or paste and bake frames by highlighting a range in the timeline that has no keyframes.
TIP: If you frequently notice rotation weirdness between two keys after using this tool, consider enabling Smart Euler Filter while working. You can also apply Smart Euler filter later on affected areas.
|


Share it:
![]()
Utility to help copying and transferring world space xforms. Some animators know this as 'Sticky Tool' or 'Animation Recorder'. It will reduce the use of locators as temporary references by a lot and make it very easy to transfer world space xforms, such as the master control animation to COG and IKs. The basic use is very simple, you copy the world space xform of selected objects and paste it somewhere.
TIP: You can paste to the same objects at another frame, other objects or even to another Maya. |

Share it:
![]()
Paste the world space xform to selected objects.
TIP: You can copy the world space xform of combined anim layers and reapply to a single anim layer.
TIP: If you frequently notice rotation weirdness between two keys after using this tool, consider enabling Smart Euler Filter while working. You can also apply Smart Euler filter later on affected areas.
TIP: You can copy the world space xform and paste to different objects.
TIP: You can paste to a bunch of keyframes at once by highlighting a range in the timeline or paste and bake frames by highlighting a range in the timeline that has no keyframes.
|


Share it:
![]()
Switch selected rig controls space attributes maintaining the pose intact. Mastering this tool will speed up your blocking workflow by a lot.
Anim by Jorge Vigara. Switching to optimum rotation orders avoids gimbal locks.
TIP: You can solve most gimbal locks with one of these 3 solutions:
TIP: Try assigning a hotkey, the UI will pop up on the spot.
TIP: If you frequently notice rotation weirdness between two keys after using this tool, consider enabling Smart Euler Filter while working. You can also apply Smart Euler filter later on affected areas.
|
Share it:
![]()
Switch rig controls space attributes maintaining the pose intact. Mastering this tool will speed up your blocking workflow by a lot.
It gets very powerful when applying to multiple keys.
Anim by Jorge Vigara. TIP: If you frequently notice rotation weirdness between two keys after using this tool, consider enabling Smart Euler Filter while working. You can also apply Smart Euler filter later on affected areas.
|
Share it:
![]()
There is no help for this tool yet. |
Share it:
![]()
There is no help for this tool yet. |
Share it:
![]()
There is no help for this tool yet. |
Share it:
![]()
There is no help for this tool yet. |
Share it:
![]()
There is no help for this tool yet. |
Share it:
![]()
A master anim curve that deforms multiple others. This is great for editing dense anim curves.
TIP: It will affect only anim curves visible in the Graph Editor. You can freely create or delete keys on a Master Spline or edit other anim curves normally.
If you select some keys and create a new Master Spline, it will take a simplified shape of that anim curve.
TIP: Enable Suspend Viewport for a much faster interaction!
|
Share it:
![]()
Special Anim Controls that help animating faster, more intuitively and with more precision. It creates powerful featured and non-destructive Anim Controls, that drive original rig controls through parent constraints. User can either keep the setup in the scene or bake it down after using it. - Create different rig setups to any rig control. - Switch anim controls to any space as well as rig setups itself. - Edit anim controls pivots, without losing the poses. - Grab and release objects. - Add extra controls for extra layers of animation.
Some examples of use: Create Simple Controls in World Space for IKs and COG to convert a treadmill walk cycle.
Create a Simple Control in Object Space for head and FK arms, while its orientation in World Space.
Create a Simple Control in Relative Space, instead of using native parent constraint. It's quicker, gives much more flexibility and doesn't destroy your poses.
Create Simple Controls in Grab Release Space to hold and release objects.
Create a Group Control in World Space for COG and IKs to truly reorient and reposition the entire animation.
Create a Group Control in World Space. Spread the objects apart by scaling it.
|
Share it:
![]()
The Temp Control will follow any object of your choice at any range of your choice. Great for animating grab and release in a non-destructible way. Different than Xform Relationship, this will keep the constraint setup, which makes easier for further editing. Some examples: Create Simple Controls in Grab Release Space to hold and release objects in complex situations.
Feel free to Add Grabs, Releases and Remove Grabs at will. Your poses will stay in place where there is a key.
Sometimes you might want to let the drivers to take full control. For those cases, just remove the keys.
|

Share it:
![]()
The Temp Control objects that you can animate.
You can edit pivot, size, shape, orientation as well as adding extra child or parent controls. |
Share it:
![]()
Create a temporary pivot for selected objects so you can rotate them from wherever you like. It doesn't change the actual object pivot or create any connection or any permanent node in your scene, everything happens on the fly.
Anim by Bruna Berford. It's great for rotating multiple objects from a single pivot.
TIP: If you frequently notice rotation weirdness between two keys after using this tool, consider enabling Smart Euler Filter while working. You can also apply Smart Euler filter later on affected areas.
|
Share it:
![]()
Use the last selected object as a pivot.
Anim by Bruna Berford. |

Share it:
![]()
Center the Temp Pivot to the selected objects bounding box. Best for two or more objects, it will keep the pivot in the center when skipping thru frames.
Anim by Alessandra Mota. |
Share it:
![]()
Keep the Temp Pivot static when skipping thru frames.
|
Share it:
![]()
Toggle ON or OFF editing the position of the Temp Pivot.
TIP: the native hotkey is INSERT. |
Share it:
![]()
Reset the Temp Pivot to its default position.
|
Share it:
![]()
Enable a very subtle and delicate manipulation mode.
Anim by Jorge Vigara. |
Share it:
![]()
Changes will propagate to the whole animation. A quick way to re-register the pose, similar as using an anim layer to make a change then merging it down, but quicker.
TIP: You can target the action to a time range.
Anim by Bruna Berford. |
Share it:
![]()
Turn on motion trail for selected objects. Motion Trail is an analysis tool designed to visualize arcs and spacing of your animation, help fixing problems with them and improving the overall motion.
It will also help you finesse your eyes regarding arcs, spacing, motion fluidity and easing. Anim by Alessandra Mota. Anim by Arturo Garcia. Anim by Bruna Berford. |
Share it:
![]()
Offset the position of the tracking point. TIP: Track the nose by adding a motion trail to the head control and offsetting the tracking point.
TIP: In case the mesh is deforming and there is no rig control that follows the nose, you can track a vertex (it’s slower, though).
Anim by Bruna Berford. |
Share it:
![]()
Track the orientation motion.
It helps fixing sliding rotations.
TIP: Rotate the motion trail offset control to look for sliding throughout the whole animation. |
Share it:
![]()
Motion Trails can be seen in several styles that will fit to different situations. Explore them all to see which ones you like.
Anim by Alessandra Mota. |
Share it:
![]()
Track a long trail while still visualizing only a small section of it.
Anim by Bruna Berford. |
Share it:
![]()
Besides the default World Space behavior, animBot Motion Trails can be seen thru Camera Space and Object Space.
Anim by Arturo Garcia. |
Share it:
![]()
Prevent viewport evaluations.
The main time consuming task for Maya is to calculate what’s gonna show in the viewport. You can gain a lot of speed by suspending the viewport when you don’t need to immediately see the results of what you are doing, like when you are nudging several keys around or cleaning up your curves in the graph editor. Tip: Auto Suspend Viewport will automatically suspend the viewport when it needs to gain interaction speed.
Anim by Carolina Delgado. |
Share it:
![]()
Quickly switch between time ranges, very useful for long animation scenes.
Bookmark frames and navigate between them.
Anim by Jorge Vigara. |
Share it:
![]()
Toggle bookmarks visibility.
|
Share it:
![]()
Navigate to single frame bookmarks or set the playblast range for time range bookmarks.
|
Share it:
![]()
Navigate to the neighbor left bookmark.
|
Share it:
![]()
Navigate to the neighbor right bookmark.
|
Share it:
![]()
Quickly edit color and/or label of current bookmark.
TIP: Use Time Bookmarks Panel for bundle edits.
|
Share it:
![]()
Remove current bookmark.
TIP: Use Time Bookmarks Panel for bundle edits.
|
Share it:
![]()
Manage your bookmarks.
|
Share it:
![]()
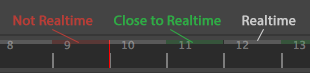
Play only keyframes.
Anim by Jorge Vigara. TIP: Select a range to quickly play only that section.
Timeline color feedback:
|
Share it:
![]()
Play only same-color keyframes.
TIP: Select a range to quickly play only that section.
Timeline color feedback:
|
Share it:
![]()
Regular playback, each frame holds one frame.
Anim by Jorge Vigara. TIP: Select a range to quickly play only that section.
Timeline color feedback:
|
Share it:
![]()
Each second frame holds two frames.
Anim by Jorge Vigara. TIP: Select a range to quickly play only that section.
Timeline color feedback:
|
Share it:
![]()
Each third frame holds three frames.
Anim by Jorge Vigara. TIP: Select a range to quickly play only that section.
Timeline color feedback:
|
Share it:
![]()
Each fourth frame holds four frames.
Anim by Jorge Vigara. TIP: Select a range to quickly play only that section.
Timeline color feedback:
|
Share it:
![]()
Several commands that are either intended to be used via hotkeys or not very often. Hence the reason they being organized in one single place without hogging UI screen space. Tip: Check the 'Recommended Hotkeys' for a list of commands that were designed to be used specially as hotkeys. They can really boost your work speed.
|

Share it:
![]()
This will fix many gimbal lock situations.
It can be applied only to the section of keys you want.
TIP: You can solve most gimbal locks with one of these 3 solutions:
|
Share it:
![]()
Remove all keys.
|
Share it:
![]()
Remove all animation outside the selected range.
It will do it in a non-destructive manner, adding anchor keys wherever necessary.
|
Share it:
![]()
Remove all keys that don't affect the curve shape.
|
Share it:
![]()
Remove anim curves that may have keys but don't affect anything.
There is a native Maya command for this, but we can't target to selected channels with it. |
Share it:
![]()
Reverse the animation so it plays backwards.
If you select a range in the timeline it will reverse that range, if nothing is selected it will reverse the playback range:
If you select keys in the graph editor, it will reverse each curve segments individually:
|

Share it:
![]()
Same as native copy keys, with the advantage of using a single command to copy from graph editor or timeline based on the context.
For more complex animation transfer, please consider using Copy Animation instead.
|
Share it:
![]()
Same as native cut keys, with the advantage of using a single command to cut from graph editor or timeline based on the context.
|
Share it:
![]()
Paste keys to graph editor or timeline based on the context. It replaces all the keys on the pasted section.
Enable Sync Timeline Display and you can quickly copy keys from one channel to another.
When focus is on Graph Editor, the first key will be pasted based on your selection.
When keys selection hasn't changed since copied, it will paste at current frame. When no keys are selected, it will paste at current frame to all anim curves shown. When some keys are selected, it will paste individually at the latest selected keys. When the anim curves are selected (all keys), it will paste at current frame to all selected anim curves. |
Share it:
![]()
Paste keys and offset them to match the value where it was applied.
Please check Paste Keys tooltip for more info, same target rules apply. |
Share it:
![]()
Same as native delete keys, with the advantage of using a single command to delete from graph editor or timeline based on the context.
|
Share it:
![]()
Set keys and keep tangents types intact.
TIP: Replace your 'S' hotkey with this command.
It will key only animated channels (use Set Smart Key All Channels if you want to key all).
Keep curves intact by highlighting a range.
If Smart Tint Keys is enabled, it will tint keys on creation based on its neighbors.
Tip: You can bake keys using either Simplify|Bake Keys Slider, Tint Key Green or Set Smart Key.
|

Share it:
![]()
Set Smart Keys to all animatable channels.
|
Share it:
![]()
Go to next or previous frame or keyframe faster and select it, without storing undo. Will also play the audio. TIP: Feel free to replace your native < > hotkeys with this command.
Jump several keys faster than the native next or previous frame or keyframe.
Anim by Carolina Delgado. Automatically selects your keys in the Graph Editor.
It will jump to and thru selected keyframes.
|
Share it:
![]()
Go to previous same-color keyframe.
Enjoy the same benefits from Smart Go To Next Keyframe, such as not storing undo, play the audio, jump several keys faster than the native next keyframe, automatically selects your keys in the Graph Editor and jump to and thru selected keyframes. |
Share it:
![]()
Go to next same-color keyframe.
Enjoy the same benefits from Smart Go To Next Keyframe, such as not storing undo, play the audio, jump several keys faster than the native next keyframe, automatically selects your keys in the Graph Editor and jump to and thru selected keyframes. |
Share it:
![]()
Snap keys in a non-destructive manner. It cleans up all decimal keys, great to use after a time scaling
It snaps keys without changing their values at frames, much better to keep the poses intact.
|

Share it:
![]()
Change attribute values on the Channel Box for multiple selected objects. Channel Box normal behaviour is to only display the last object selected attributes, this tool will override that with a list of all attributes from all the objects you have selected.
TIP: It's available in the Auto Bots menu too.
|
Share it:
![]()
Automatically clear channel selection to prevent actions on filtered channels accidentally. It will clear every time your selection changes or you click on the manipulator.
Anim by Eduardo Conter. |
Share it:
![]()
Clear channel selection in Channel Box so curves from Timeline are no longer filtered.
TIP: Set up a hotkey for this command.
|
Share it:
![]()
Tint your timeline when you have channels selected in the Channel Box. You will never move keys around without noticing anymore.
|
Share it:
![]()
An extra animBot toolbar for the Graph Editor. |
Share it:
![]()
Automatically hide anim curves that may have keys but don't affect anything. It cleans up the graph editor and leave only meaningful information.
|
Share it:
![]()
Frame the current second, starting from the current frame.
why use this tool? Since you can scale the width of the anim curves in the Graph Editor, it becomes hard to connect the actual timing those curves represent. When you get used to see one second at a time, the timing or your anim curves will naturally start making more sense and it will be easier to detect areas of abrupt acceleration and pops. |
Share it:
![]()
Frame one second at a time. Helps you cleaning up your anim curves in the graph editor.
why use this tool? Since you can scale the width of the anim curves in the Graph Editor, it becomes hard to connect the actual timing those curves represent. When you get used to see one second at a time, the timing or your anim curves will naturally start making more sense and it will be easier to detect areas of abrupt acceleration and pops. TIP: Use Suspend Viewport and you will clean up your curves in no time!
|
Share it:
![]()
Hide anim curves that may have keys but don't affect anything. It cleans up the graph editor and leave only meaningful information.
|
Share it:
![]()
Toggle the axis orientation for Move, Rotate or Scale Tools.
Only the most used modes will cycle: Move and Scale - object, world and parent. Rotate - object, world and gimbal. |
Share it:
![]()
Aim and Orient the manipulator axis to the camera. This is a great way to move, rotate or scale objects in relationship with the camera.
|
Share it:
![]()
Orient the manipulator axis to the local axis of the last object in the selection.
|
Share it:
![]()
Select objects from current keys. Useful to find that nasty key that was causing that weird animation.
TIP: Use this command in combination with Select Hierarchy and you will find everything.
|
Share it:
![]()
Deselects all objects that are not animated or has only static animation. Useful when you want to keep only objects that you have animated, for example when going from blocking to spline.
Anim by Jorge Vigara. |
Share it:
![]()
Select all the animation curves existent in your scene. Useful whenever you want to perform actions on everything that's animated, such as retiming the whole scene.
|
Share it:
![]()
Select all animatable nodes under the current selection hierarchy. Useful when you need to find a keyframe that's causing a pop, or to make sure the rig has no animation.
|
Share it:
![]()
Select all animated nodes under the current selection hierarchy. Useful when you need to find what has been animated under the whole hierarchy.
|

Share it:
![]()
Select all animatable controls from the current selected rig(s).
Anim by Jorge Vigara. |
Share it:
![]()
Select all animated controls from the current selected rig(s). Useful when you need to find what rig control has been animated for a character.
|
Share it:
![]()
Grow the timeline or graph editor keyframe selection.
|

Share it:
![]()
Grow the timeline or graph editor keyframe selection to the left.
|

Share it:
![]()
Grow the timeline or graph editor keyframe selection to the right.
|


Share it:
![]()
Shrink the timeline or graph editor keyframe selection.
|

Share it:
![]()
Shrink the timeline or graph editor keyframe selection from the left.
|

Share it:
![]()
Shrink the timeline or graph editor keyframe selection from the right.
|

Share it:
![]()
Display only the top half of the waveform. This gives a better visualization of the sound beats.
|

Share it:
![]()
Quick toggle timeline height. Toggle between 1x, 2x and 7x (great when working lip sync).
|
Share it:
![]()
Load sound in the timeline upon opening a scene. Up to Maya 2017, whenever we open a scene the sound will be turned off. This will make sure we don't need to set that manually every single time we open the scene. |
Share it:
![]()
Enable extra gestures on the timeline. Hold ALT and you can nudge keys around with a single click-drag.
It displays the frame distance from neighbors keys and how many frames is being nudged. It also has other benefits, like disabling viewport updates while dragging, to boost nudging response and replacing keys instead of stacking them up.
Hold ALT + SHIFT to highlight the timeline from the current frame up to the frame under the cursor, then release the keys while still holding the mouse button to scale them.
It displays the scale percentage and the final amount of frames in the range scaled. Use the mouse wheel to scrub through frames.
Hold ALT + CTRL and use the mouse wheel to scrub through keyframes.
Hold SHIFT and use the mouse wheel to grow or shrink keyframe range selection.
Hold SHIFT + ALT and use the mouse wheel to grow or shrink keyframe range selection to the left.
Hold SHIFT + CTRL and use the mouse wheel to grow or shrink keyframe range selection to the right.
Hold ALT or CTRL and use the mouse wheel to edit the playback range.
|


Share it:
![]()
Sync the isolate select on all viewports.
TIP: Try using Select Sets to isolate stuff in your scene instead of the native Maya layers!
Anim by Bruna Berford. |
Share it:
![]()
Automatically adjust the camera tumble pivot so it tumbles around selected objects.
This will save you a lot of 'F' key pressing. |
Share it:
![]()
Show only geometry on the current viewport.
This is good for a clean viewport, usually for playblasting. It will include all geometry nodes, such as NURBS Surfaces, Polygons, Subdiv Surfaces, Plugin Shapes and GPU Cache. It will also turn OFF the grid and manipulators. TIP: You can override these settings by using Snapshot Playblast Visibility Mode. |
Share it:
![]()
Saves the current viewport visibility state to be used as the Playblast Visibility Mode. |
Share it:
![]()
Clear and restore the original settings for Playblast Visibility Mode. |
Share it:
![]()
Set to Playblast Visibility Mode while manipulating and playing.
|
Share it:
![]()
Show only geometry and rig controls on the current viewport.
This is good to clear the viewport for animation, as usually we don't want to see anything but geometry and rig controls. It will include NURBS curves and Controllers. TIP: You can override these settings by using Snapshot Animation Visibility Mode. |
Share it:
![]()
Saves the current viewport visibility state to be used as the Animation Visibility Mode. |
Share it:
![]()
Clear and restore the original settings for Animation Visibility Mode. |
Share it:
![]()
Show or hide geometry on the current viewport. This is good to select hidden controls.
It will include all geometry nodes, such as NURBS Surfaces, Polygons, Subdiv Surfaces, Plugin Shapes and GPU Cache. |
Share it:
![]()
Show or hide Controllers on the current viewport. It is a shortcut to the menu below with the advantage of being able to set a hotkey.
|
Share it:
![]()
Show or hide Particle Instancers on the current viewport. It is a shortcut to the menu below with the advantage of being able to set a hotkey.
|
Share it:
![]()
Show or hide Hold Outs on the current viewport. It is a shortcut to the menu below with the advantage of being able to set a hotkey.
|
Share it:
![]()
A collection of Animation Curves tools. |
Share it:
![]()
A collection of Channel Box tools. |
Share it:
![]()
A collection of Graph Editor tools. |
Share it:
![]()
A collection of Manipulator tools. |
Share it:
![]()
A collection of Selection tools. |
Share it:
![]()
A collection of Timeline tools. |
Share it:
![]()
A collection of Viewport tools. |
Share it:
![]()
When ON, it will help preventing gimbal locks by automatically applying an Euler Filter pass to sections transformed by certain animBot tools.
TIP: You can also apply Smart Euler Filter any time you need.
Effective for many animBot tools such as Tweener, Ease In Out, Mirror Pose, Paste Pose, Paste Insert Animation, Align Objects, Paste Xform, Attribute Space Switcher and Temp Pivot. TIP: If you frequently notice rotation weirdness between two keys after using any of the tools above, consider enabling Smart Euler Filter while working. You can also apply Smart Euler filter later on affected areas.
Remember: In case the rotation from one key to the next exceeds 90 degrees intentionally, you might want to turn this OFF, or it will normalize it.
|
Share it:
![]()
Activate overshoot mode and the sliders go further than 100%. TIP: Bake Keys will make half frames when overshoot is activated.
|
Share it:
![]()
A convenient pop up window to use animBot Sliders on the spot.
TIP: Assign a hotkey to this command.
You can also use mouse wheel.
|

Share it:
![]()
All animBot snapshots at once. Select all controls of your rig at the default T-Pose and animBot will scan your rig controls and prepare itself for Select Opposite, Mirror and Reset Pose.
|
Share it:
![]()
Restore your animation in case of a Maya crash and allow you to load older animation states. It will prompt you to load animation back in case of the previous Maya session crashed.
Load older animation states for the whole scene or just for a few objects.
|
Share it:
![]()
animBot Tools that run in the background.
Tools like the Anim Recovery and Selection Display run in the background. They are constantly listening to Maya activities so they can perform actions when needed. For instance, the selection display will listen to your current selection and whenever that change it will update the display. The technical term for those background activities is 'callback'. Autobots is a collection of all animBot callbacks and a center place where you can manage them. |
Share it:
![]()
Every animBot tool, command, help topic and tutorial can be found and executed here.
Tip: This is a great place quickly find help and set hotkeys. |

Share it: